Introduction
This was by far the longest and most extensive project that we did. It was composed of several smaller projects: the solar water heater project, the daylighting techniques project, the materials heat lab, the tiny house project, and the wind turbine design and poster.
Solar water heater
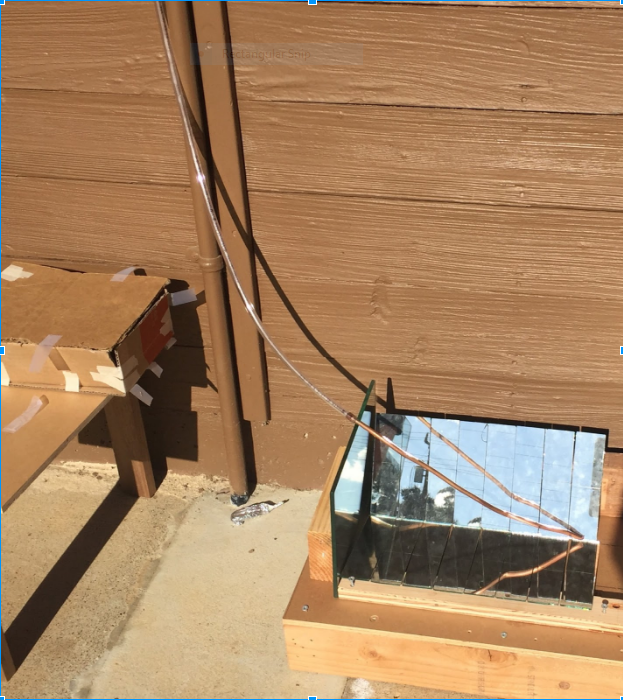
To test different ways to heat water without the use of electricity, we set up an experiment where each group made a solar water heater. We ran the test for about 70 minutes and then took the temperatures of the water in each heater. We then used the equation Q=mCwT to find the total heat gained by the water. Our heater consisted of a copper tube where the water was put into to heat. We chose copper because it is a good conductor and would heat the water up faster than just having the water in a transparent container. we then set up a reflector behind the tube that was angled at slightly less than 60 degrees. 60 degrees is the angle that will bounce sunlight straight back at itself in winter, when we did our test. Having it slightly less than this has the light also hit the tube from behind. After 70 minutes, our water heater produced 502 joules of heat. This was not however, the most successful design. The most successful design used a parabolic reflector that reflected the light onto a copper tube that was painted black to absorb more light.
Daylighting techniques
To test different techniques of daylighting a house, we built a cardboard house that had all the daylighting techniques on it so we could test the effects of all of them.
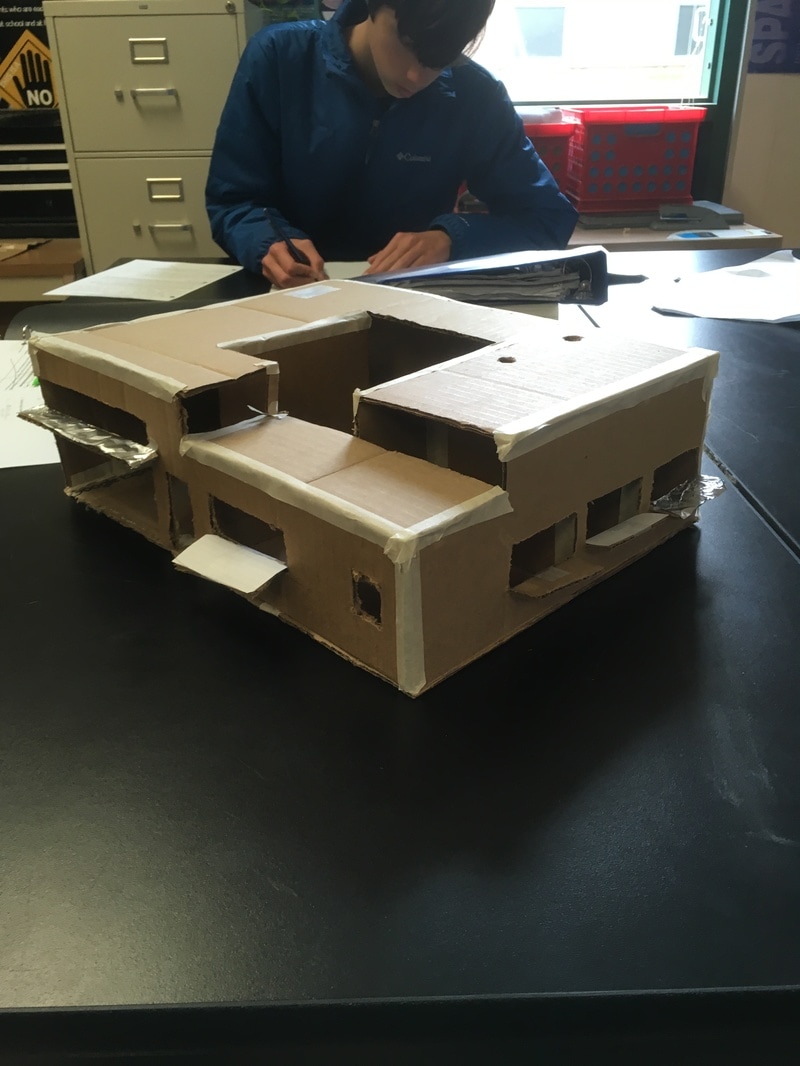
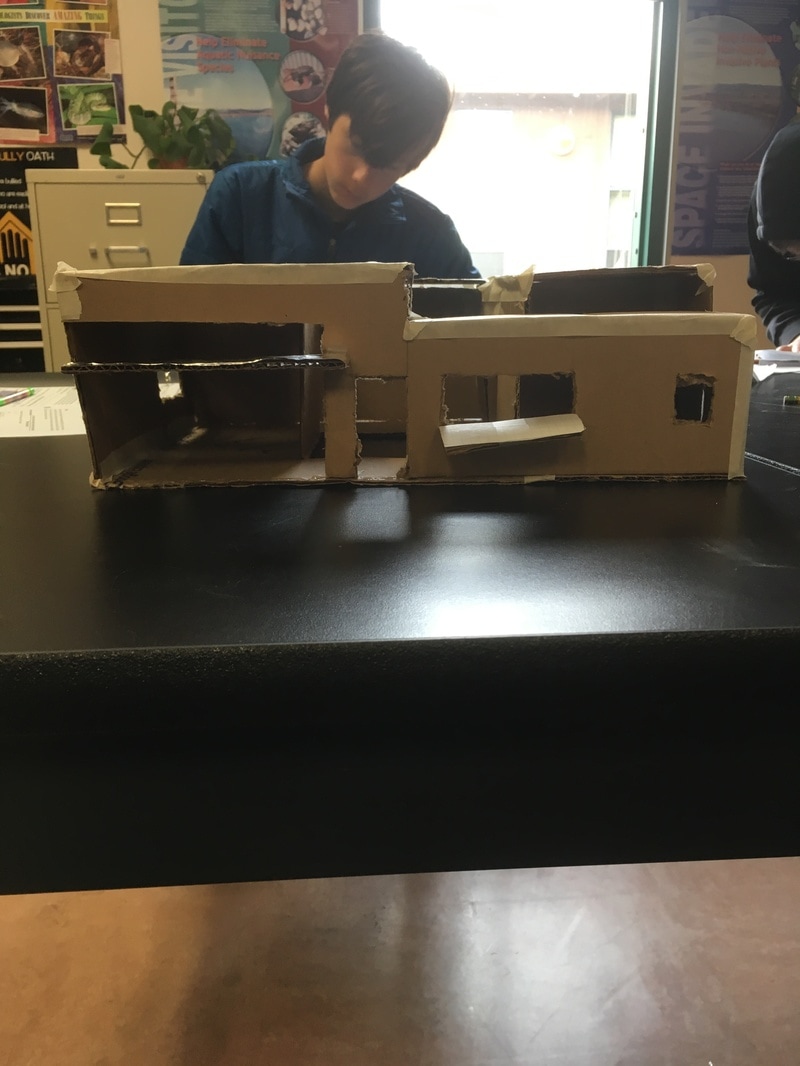
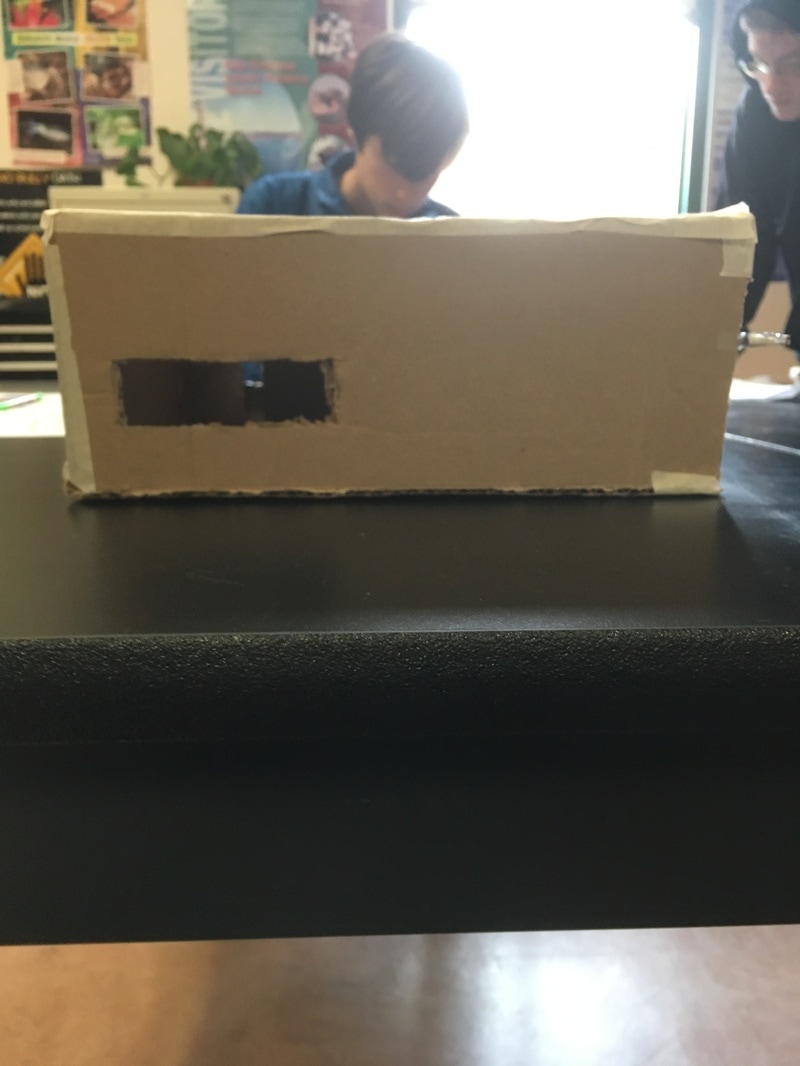
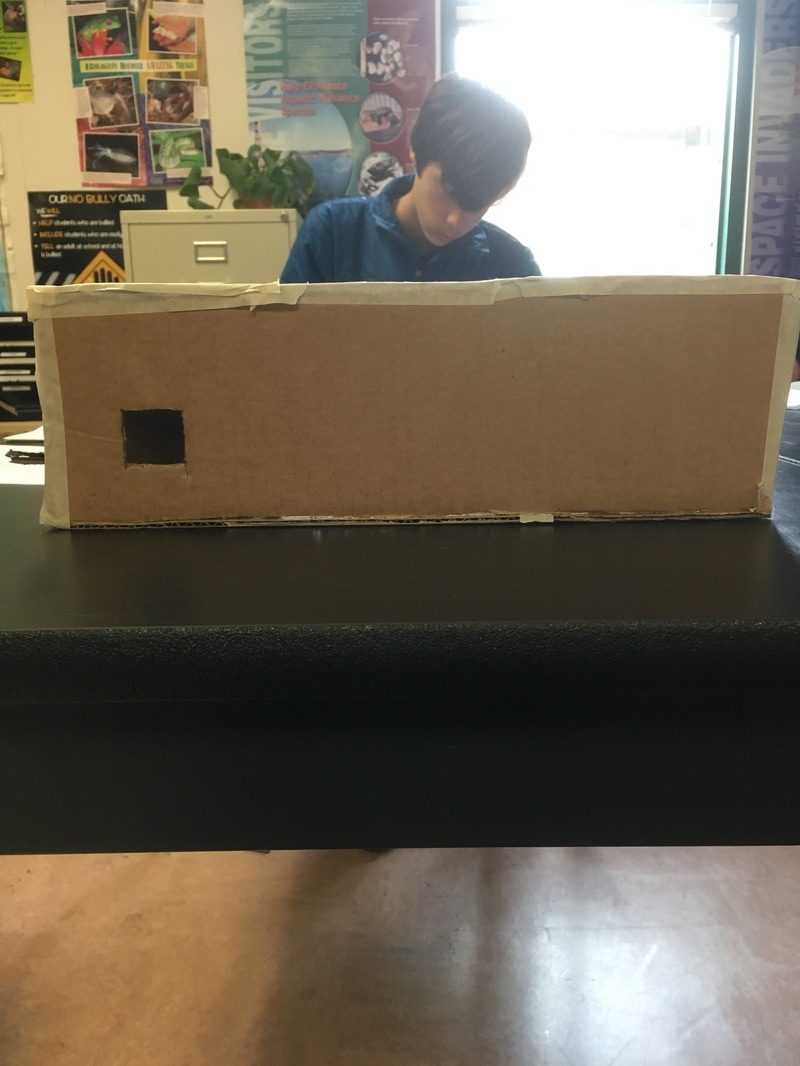
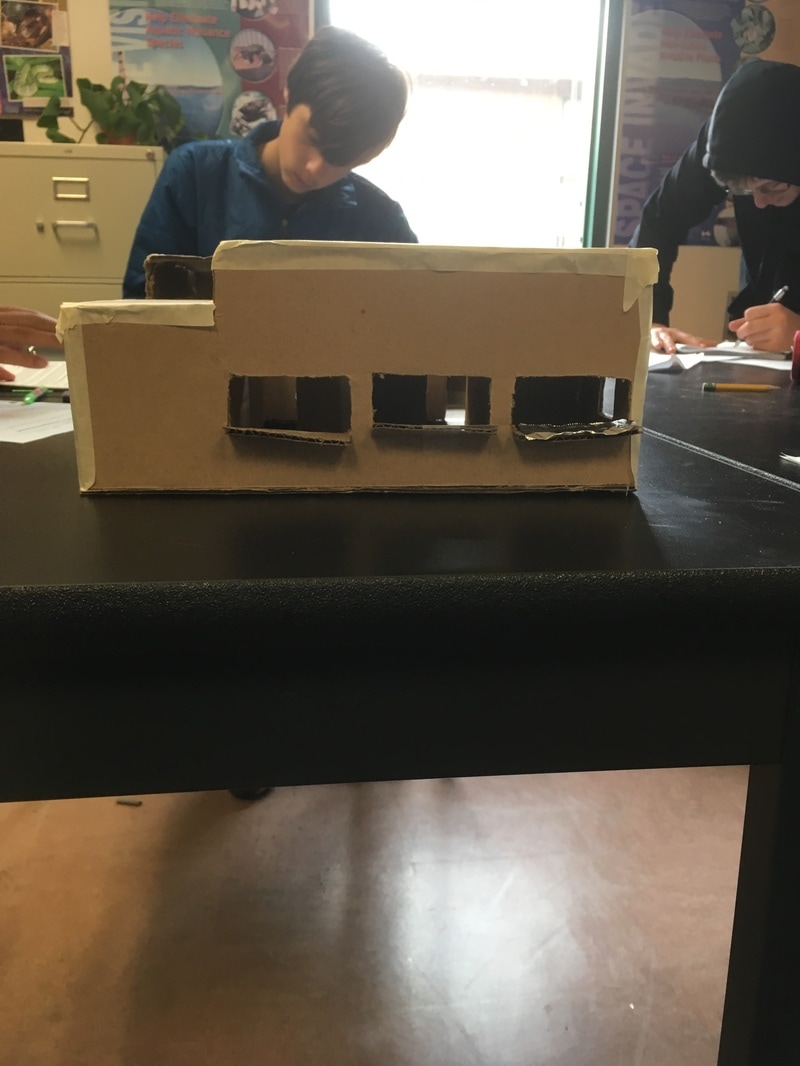
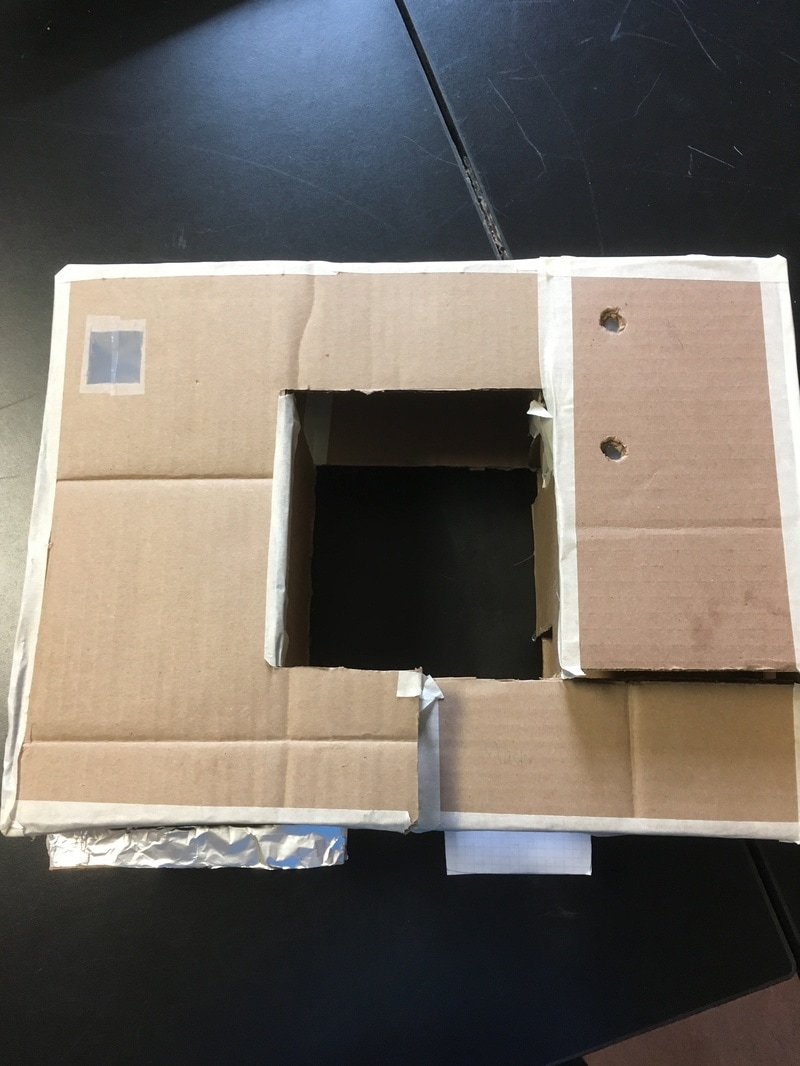
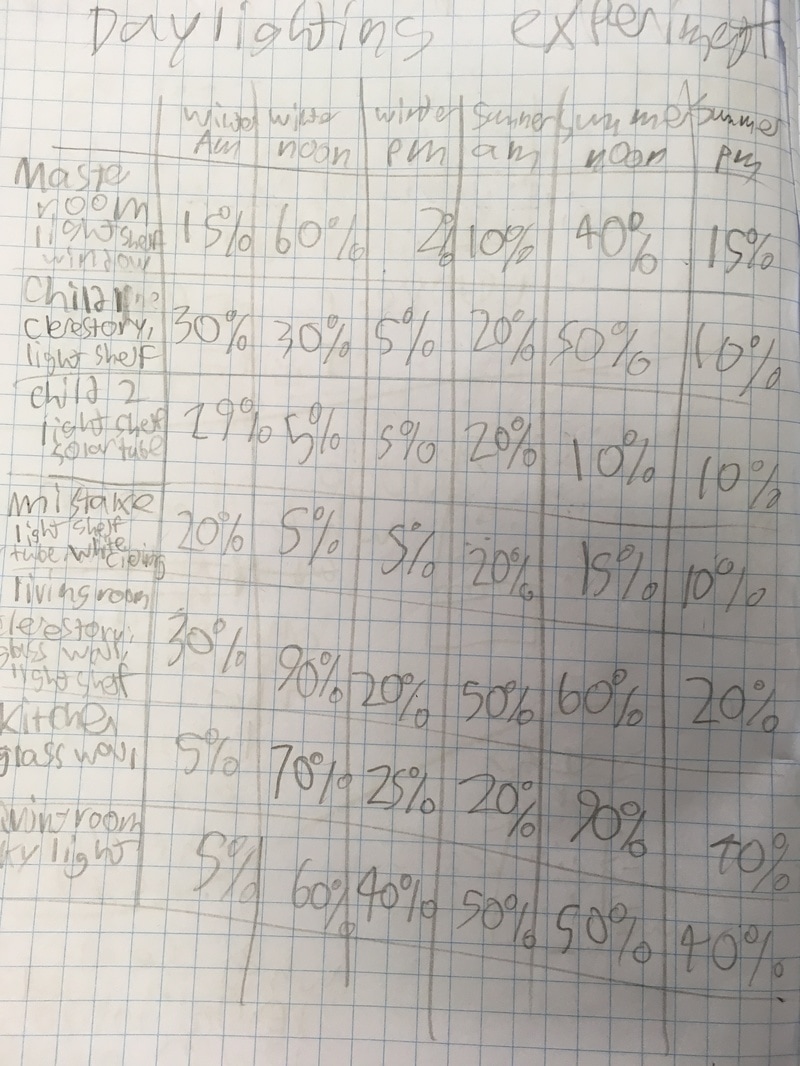
We tested this model with how sunlight would hit it in winter AM, winter noon, winter PM, summer AM, summer noon, and summer PM.
Materials heat testing lab
Our third lab was the material heat testing lab where we tested the thermal properties of several different materials that we would use in our tiny house. We used a heat lamp and recorded the temperature of the material at 0 minutes, 5 minutes, and 10 minutes.
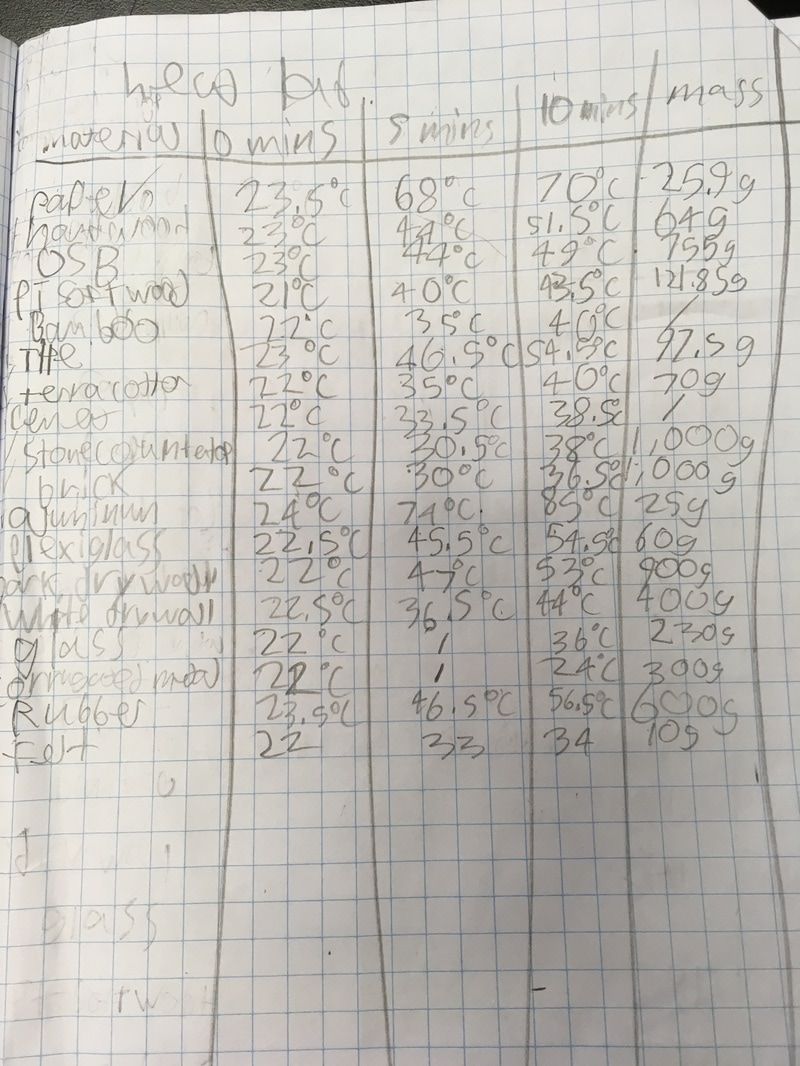
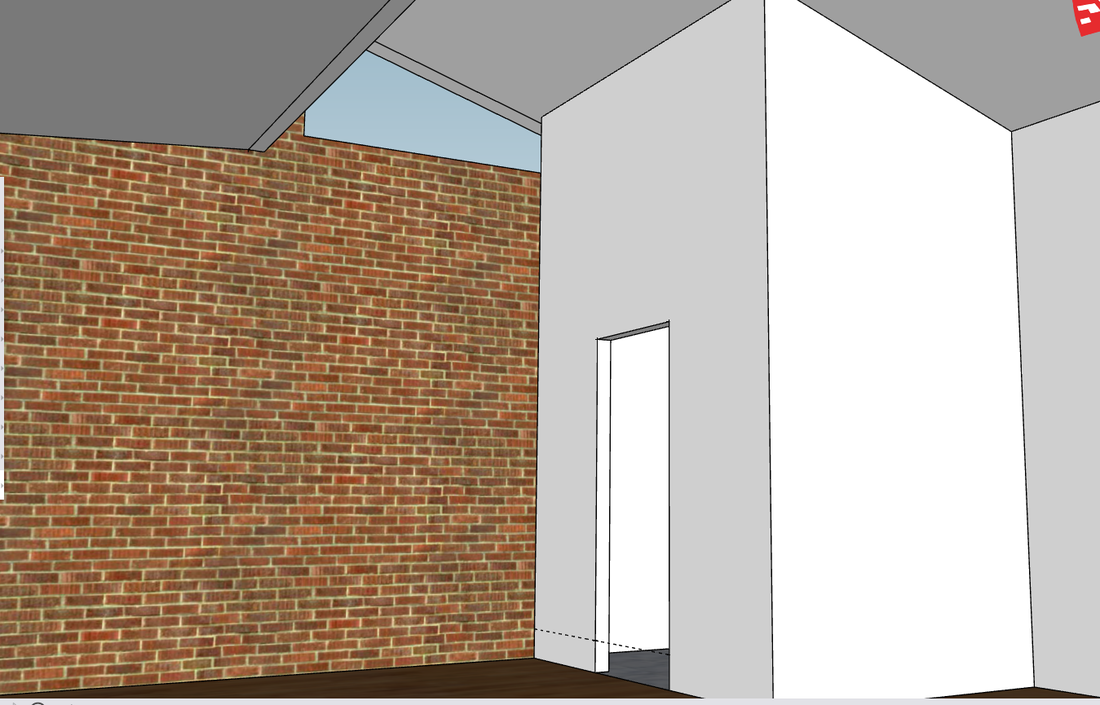
To create a heat-intelligent solar house, the roofing is best made out of aluminum and that a brick wall should be placed somewhere in the house, preferably in direct sunlight during the day. We came to this conclusion when we tested the rate at which certain materials heated up. We used a heat lamp and measured the temperature before the experiment, at five minutes and at ten minutes. We then compiled our data into a graph. The aluminum heated from 24℃ to74℃ in the first five minutes and to 85℃ in the last five. The brick heated from 22℃ to 30℃ in the first five minutes and to 38 in the last five. If we look at this data, we can clearly see that aluminum has a very low specific heat capacity because to it heating up quickly and that brick has a very high specific heat capacity because it heated up slowly. Using this information, we can make choices for our tiny house that keep its temperature regulated without the use of electric heaters. Because of the aluminum’s low specific heat capacity, it is useful as a roofing material. It is also very reflective so it keeps off most of the heat. Brick on the other hand, has a very high specific heat capacity, this means it should be put on one of the interior walls. It will then stay cold longer during the day and keep the house cool and stay warmer longer at night
Tiny house design
We then made a tiny house that incorporated everything that we had learned in the previous labs. We started by making a series of blueprints.
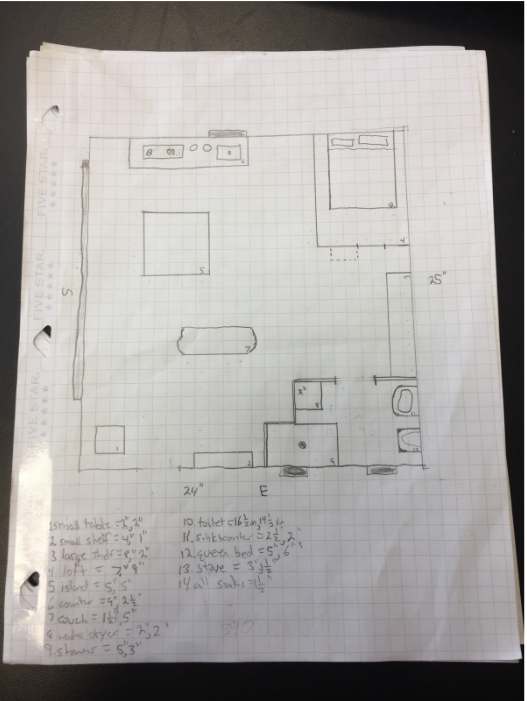
This is our floor plan. Our house has a total area of 540 square feet. It features an open concept with the kitchen, dining area and sleeping area all in the same room. Our utility/bathroom is divided from the rest of the house by two walls.
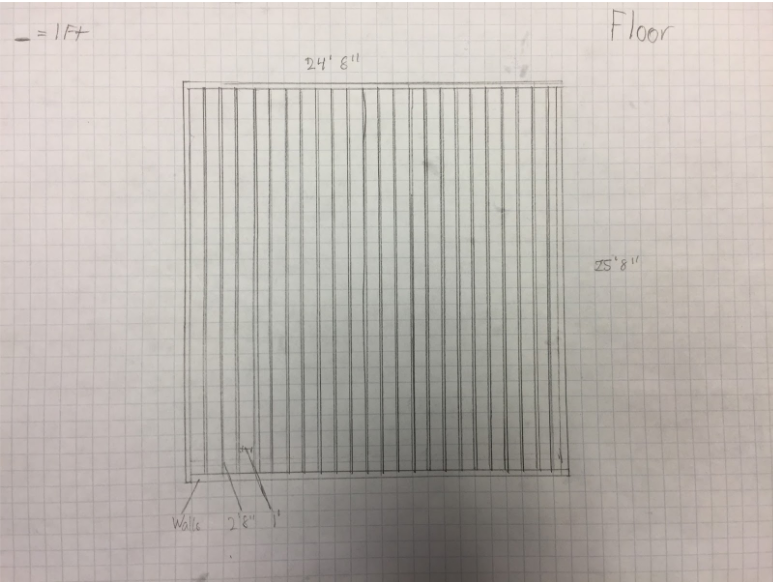
Our first floor blueprint was good for planning where the furniture would go but it didn't show us where the actual floor beams would go, that's why we made this stud diagram for the floor.
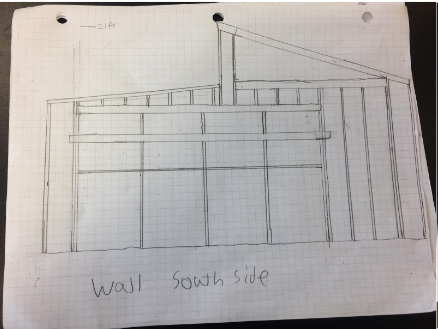
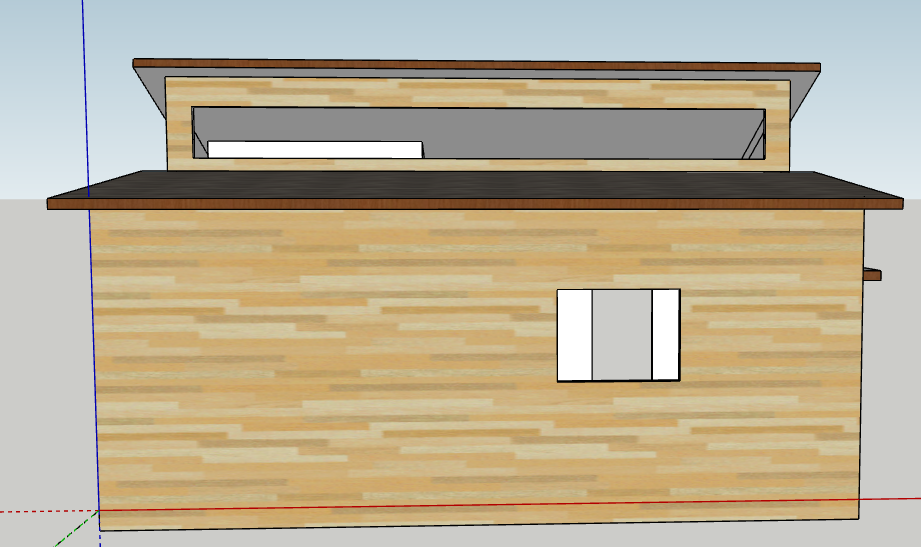
This is the south wall of our house. As you can see, it has two very large windows to take advantage of natural light.
This is the north side of our house. This is the wall where the least sunlight will hit, that's why it has the least amount of windows.
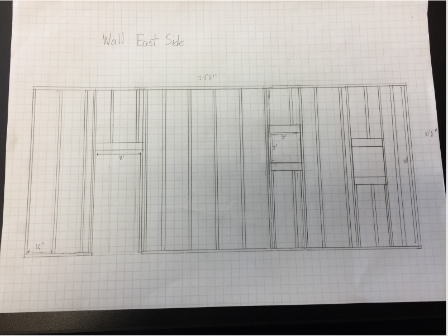
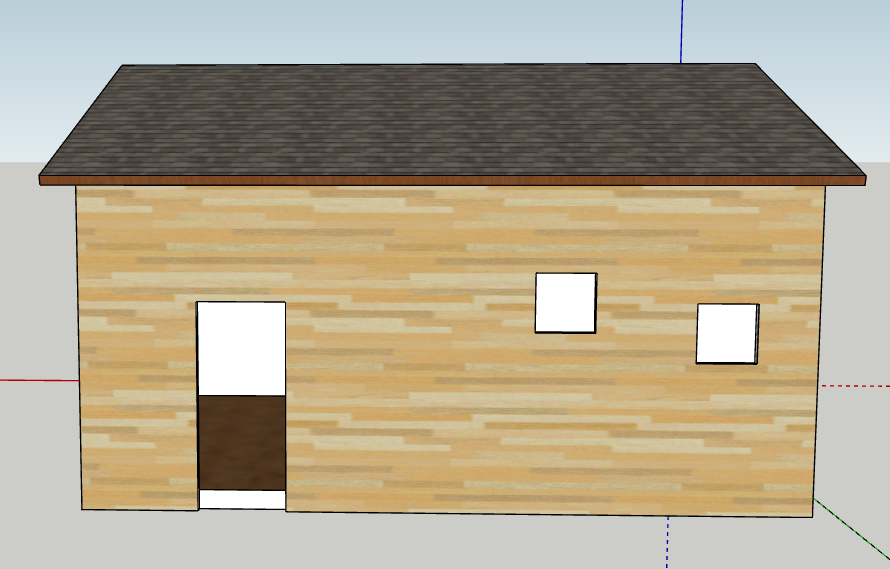
This is the east wall of our house and is where the front door is. The other two windows that you see are for the bathroom.
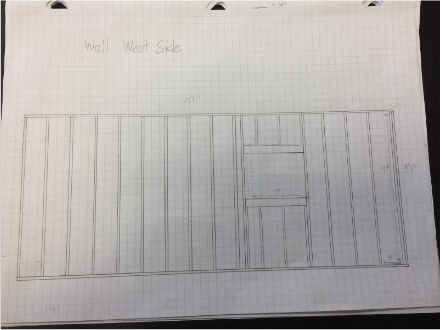
This is the west wall of our house. the window is in the kitchen above the sink.
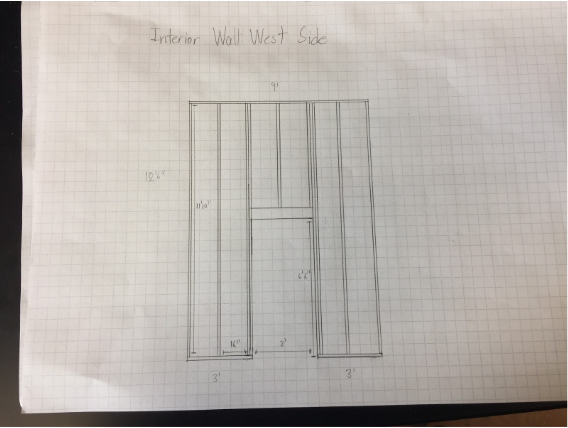
This is one of the interior walls that separates the bathroom from the rest of the house.
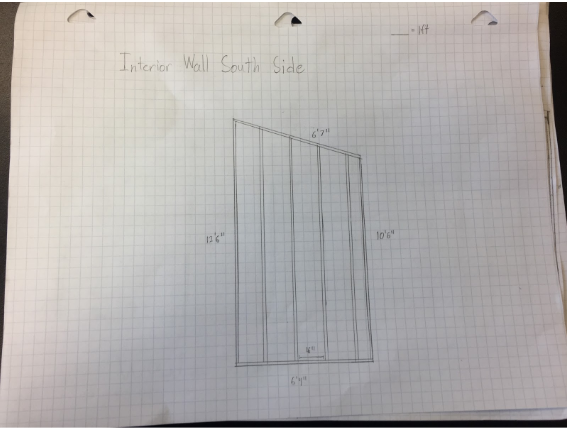
This is the other wall that separates the bathroom from the rest of the house.
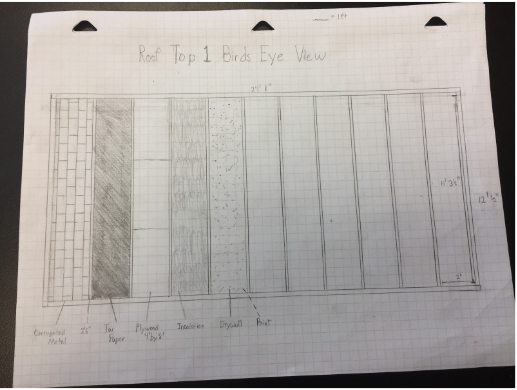
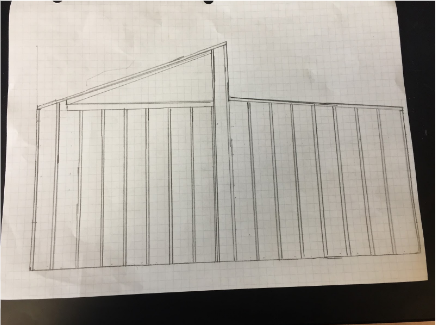
This is our first rooftop, it sits above the kitchen and sleeping area.
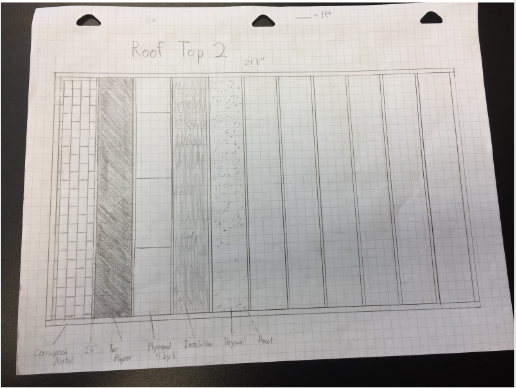
This is our second rooftop, it sits above the Bathroom and entrance area. The two rooftops are separated by the clerestory window.
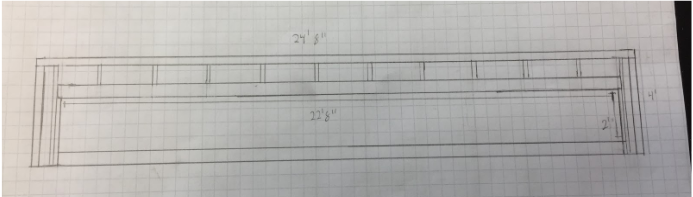
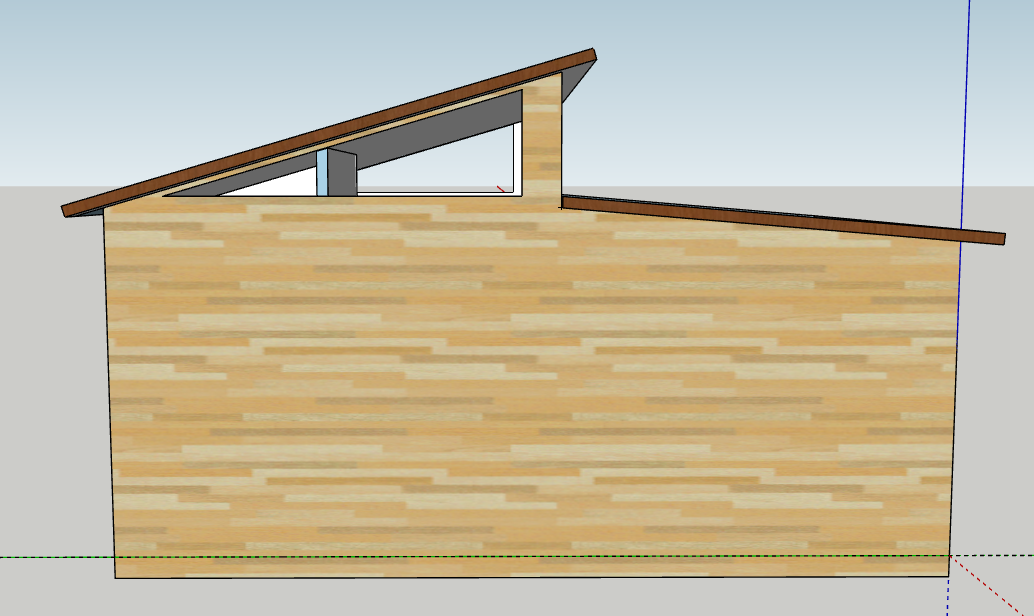
This is the clerestory window that separates the rooftops and faces west.
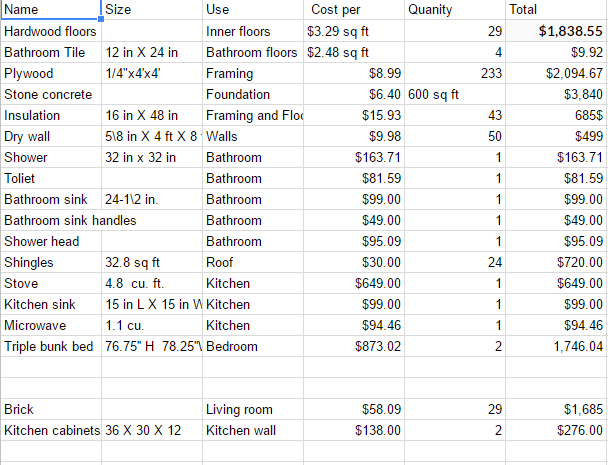
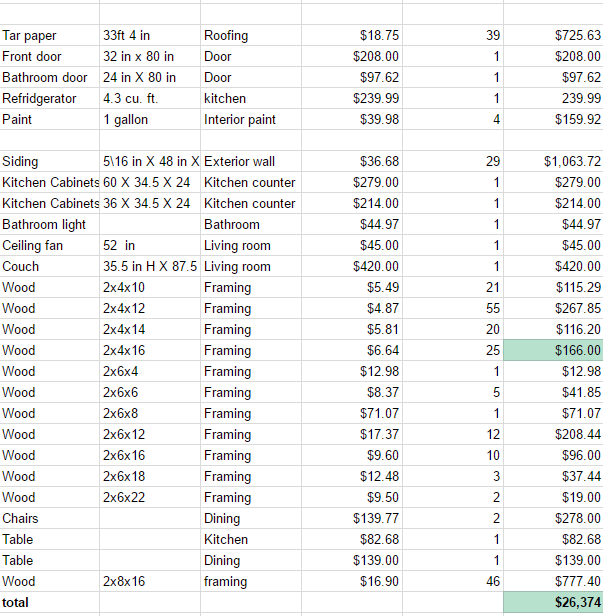
We made a detailed spreadsheet with all of the materials, quantities, and costs that we would need to build this house. We made intelligent choices regarding the thermal properties that we learned about in our heat lab. We incorporated a brick wall into our house that keeps the temperature regulated. We also put into account all of the furniture and appliances that the house would need. In the end our house costed around $26,374, which is about $49 per square foot, which is significantly cheaper than the average cost per square foot to build a house which is around $115.
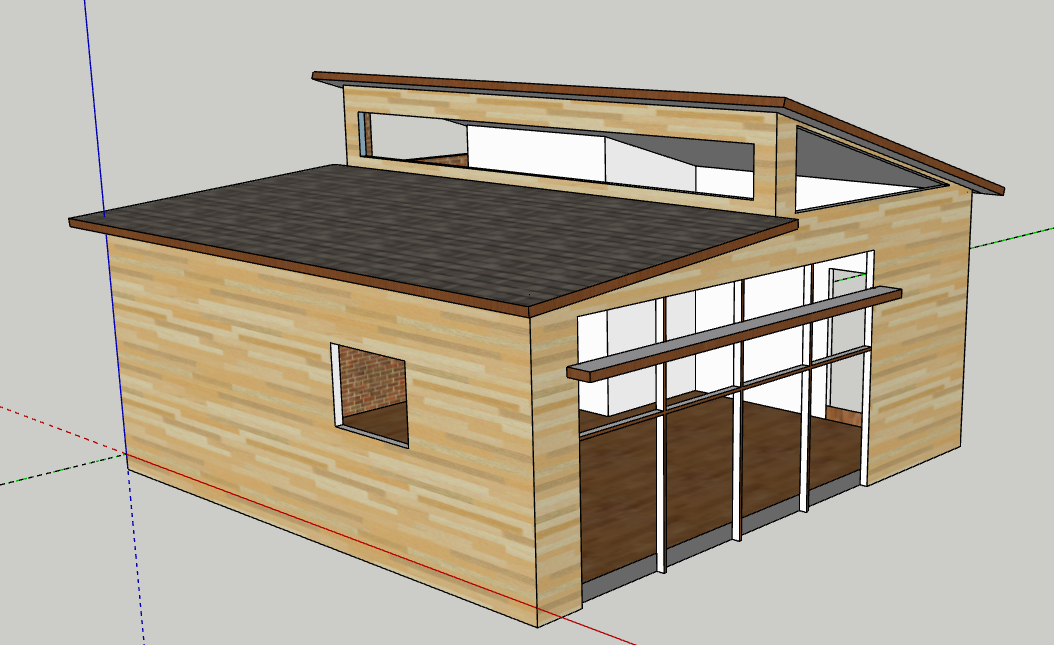
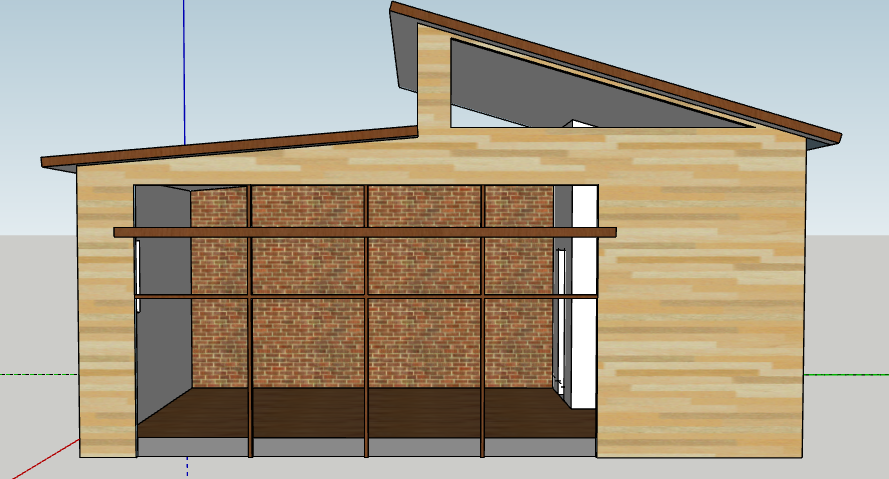
After doing all this, we created a computer model with a program called sketchup.
After doing all this, we created a computer model with a program called sketchup.
COncepts that we learned in this project
Radiation - Radiation is the transfer of energy by electromagnetic radiation, specifically infrared. Radiation was important in our project because it is the way that heat comes to us from the sun.
Conduction - Conduction is the transfer of heat between solids or liquids when they are in contact with each other. conduction is the fastest form of heat transfer so we needed to focus on it in our water heater lab so that we could heat up the water as fast as possible.
Convection - The movement of molecules in a gas due to heat changes. Convection is responsible for the wind and weather on our planet.
Insulation - The ability of a material to keep a volume at a certain temperature. We tested lots of different types of insulation in our materials heat testing lab. We also needed to decide on what materials we would use to insulate our house.
Seasonal changes to sunlight - We learned in our daylighting lab that the angle and power of the sun changes over the course of the year. This is because of the tilt of the earth and its rotation around the sun. In the northern hemisphere in northern California in winter, the sun is about 30 degrees up from the horizon and 70 degrees in summer and always in the southern sky. We had to be aware of this when building our tiny house. We did that by giving our south side one large window with a significant overhang.
Daylighting techniques - During our daylighting project, we learned about several different techniques that could be used in a house to make the inside brighter with natural light.
Light shelves - Light shelves are shelves that are put under of on windows on the outside of a house. They reflect sunlight onto the ceiling of the house which then diffuses and lights the house. Our tiny house has a large light shelf on our large, south facing window.
Clerestory windows - Clerestory windows are long windows that are placed up at the ceiling of a house and light the wall opposite of it. They don't bring in direct sunlight which is good. Our tiny house has a large, west facing clerestory window for light in the evening.
Solar tubes - Solar tubes are aluminum tubes that run from the roof the the ceiling of a house. Sunlight gets reflected in and then hits the diffuser at the bottom which spreads the light evenly in the room in which it is placed. We tested the effectiveness of solar tubes in our daylighting lab.
Skylights - Skylights are windows on the roof of the house that let in extra natural light. Our model in the daylighting lab had a skylight in the dining room.
South facing windows - As I already explained, the sun is usually in the southern part of the sky. Because of this, our daylighting model and our tiny house had a large, south facing window.
Interior color choices - We learned in our materials heat testing lab that objects with a lighter color reflect more light and heat. This is because the color white is all the wavelengths of visible light put together. This means all visible light will be reflected and most likely also infrared radiation (heat). This means a room with white walls and ceiling is brighter than one with darker ones.
Specific heat capacity - An objects ratio of how much heat is put into it vs how much the temperature rises. Objects with a high specific heat capacity will heat up and cool down slower than an object with a high heat capacity in the same situation. In our materials heat lab, we discovered which materials have a high specific heat and which have a low specific heat. This was then useful when we decided what materials our house would be made of.
Justification document
reflection
This was by far the most extensive and in depth project that we did this year. We learned a lot about thermodynamics and how to apply that knowledge to the real world. I think that we did a very good with the 3d model and the budget calculations, we made sure that we thought of everything. I also thought that our collaboration in our group was good. We evenly divided up the tasks so that everyone had something to work on and got things done quicker. I think we could have improved our workflow though. We started off without making blueprints, which was a bad idea. Next time we will make the blueprints first. Another thing that we could have improved is our slideshow. We did't have that much time to work on it and it was a little lacking. next time we will work on the presentation more.
